Choosing the right window opener can feel overwhelming with so many types, specifications, and brands on the market. Buy the wrong one, and you might end up with a motor that struggles to lift your window, fails in windy weather, or simply doesn’t fit your frame.
This guide cuts through the technical jargon and provides a step-by-step approach to selecting the perfect window opener for your specific needs.
Step 1: Define Your Window Type and Operation
Before you even look at motors, you need to understand what kind of window you have. This is the single most important factor in compatibility.
| Window Type | Common Opener Choice | Notes |
|---|---|---|
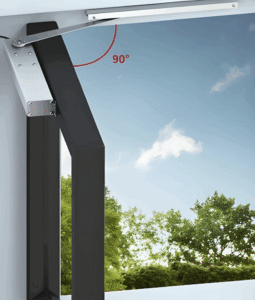
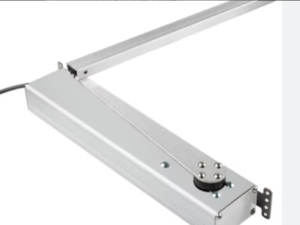
| Casement (Side-Hung) | Chain Actuator | The most common and easiest to automate. |
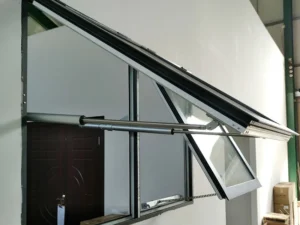
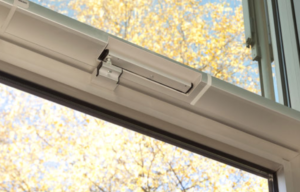
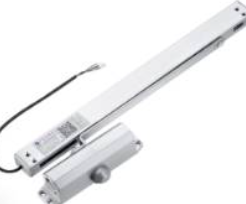
| Top-Hung (Outward Opening) | Chain or Linear Actuator | Chain for light weight; Linear for heavy glass. |
| Tilt & Turn (Inward Opening) | Specialized Linear Actuator | Requires an opener designed for the “tilt” function. |
| Skylight / Roof Window | Chain or Linear Actuator | Must have a safety feature to auto-lock if the chain breaks. |
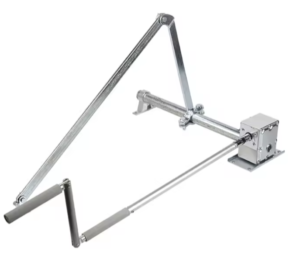
| Louver / Jalousie Windows | Rack-and-Pinion or Linear | Requires high force to move multiple blades at once. |
| Sliding Windows | Not Standard | These usually require different mechanisms (e.g., sliding window motors). |
Pro Tip: If you have a wooden frame, ensure the mounting bracket screws will have enough bite. If you have aluminum frames, you may need special rivet nuts or brackets.
Step 2: Calculate the Required Force (Thrust)
This is where most people go wrong. The motor needs enough power (measured in Newtons or Pounds) to push the window open.
The Formula:
You generally need an opener that provides 1.5 to 2 times the force required to just move the window.
How to estimate:
- Light Windows (Standard PVC or small wooden): A 150N – 250N chain opener is usually sufficient.
- Medium Windows (Larger PVC, double-glazed): Aim for 350N – 500N.
- Heavy Windows (Triple-glazed, large aluminum, industrial): You need 600N – 1000N+ linear actuators.
- Skylights (Horizontal): Because gravity is working against you, always go one size up (e.g., use a 500N motor for what would be a 250N vertical window).
Safety Margin: If your window is stiff to open manually, the motor will struggle too. Fix the window mechanics before installing an opener.
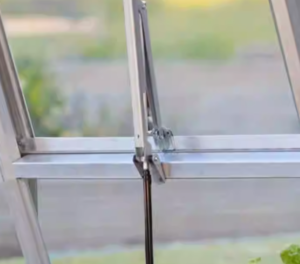
Step 3: Measure the Stroke Length
Stroke length is how far the opener pushes the window open. This determines your ventilation capacity.
- Minimum for ventilation: 150mm – 200mm (6 – 8 inches)
- For good airflow: 300mm – 400mm (12 – 16 inches)
- For smoke ventilation (NSHEV): Often requires a stroke that achieves a specific free opening area (usually defined by local fire codes).
How to measure: Open your window to the desired width and measure the distance between the mounting point on the frame and the mounting point on the sash. Add 10-15mm for safety.
Step 4: Check the IP Rating (Weather Resistance)
If the opener is installed outdoors (on the window frame), it must be protected against rain and dust.
- IP32: Suitable for indoor use only (e.g., inside a sunroom or conservatory).
- IP44: Protected against splashing water. Minimum for sheltered outdoor use (under an eave).
- IP54 / IP65: Dust protected and protected against water jets. Recommended for exposed locations or coastal areas.
Step 5: Choose Your Control System
How do you want the opener to operate? Your choice here affects the wiring and accessories you need.
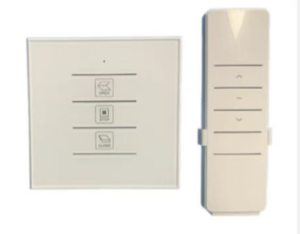
- Manual Switch: Simple push-button or rocker switch. Cheapest option.
- Remote Control: Usually comes with a RF remote kit. Good for skylights you can’t reach.
- Smart Home / WiFi: Allows control via smartphone (Alexa, Google Home, Apple Home). Requires a smart controller module.
- Sensor-Based (Automatic):
- Rain Sensor: Closes the window automatically when it starts raining.
- Temperature Sensor: Opens the window when the room gets too hot (common in greenhouses).
- BMS Integration: For commercial buildings, openers often need to connect to a central control system via potential-free contacts or protocols like KNX, Modbus, or 0-10V dimming.
Step 6: The “Reality Check” Checklist
Before you click “buy,” ask yourself these five questions:
- Does it fit physically? Measure the installation space. Some linear actuators are very long when retracted.
- Is it the right voltage? Most home systems use 24V DC (safe low voltage). Industrial systems sometimes use 230V AC. Ensure your power supply matches.
- Does it have a manual override? If the power goes out, can you still open the window manually? (Essential for bedrooms and emergency egress).
- Is the limit switch adjustable? You need to be able to set exactly how far the window opens and where it stops when closing.
- Is it synchronized? If you have one very large window with two openers (one on each side), you must buy a synchronized pair, otherwise, one motor will run faster and twist the window frame.
Common Mistakes to Avoid
- Buying cheap, unbranded units: The internal gearing is often plastic. They may work for a month, then strip their gears in the first heatwave.
- Ignoring wind load: A chain opener on a large, high-rise window will act like a sail in the wind. The chain will buckle. Always choose linear for windy sites.
- Incorrect mounting: Mounting the bracket slightly off-angle can cause the opener to bind and burn out the motor.
Conclusion: Your Decision Tree
- For a standard home casement window: Choose a 24V DC Chain Actuator (250N-350N) with an IP44 rating and a remote control.
- For a heavy roof skylight: Choose a 24V DC Linear Actuator (500N-800N) with an IP65 rating and a rain sensor.
- For a commercial building smoke vent: Choose a 24V or 230V Rack-and-Pinion or Heavy Linear Actuator compliant with local fire standards, integrated with the BMS.
- For a minimalist architect-designed home: Choose Concealed Friction Stay Actuators.
Take your time, measure twice, and match the specs to your environment. The right opener will provide years of trouble-free automatic fresh air.